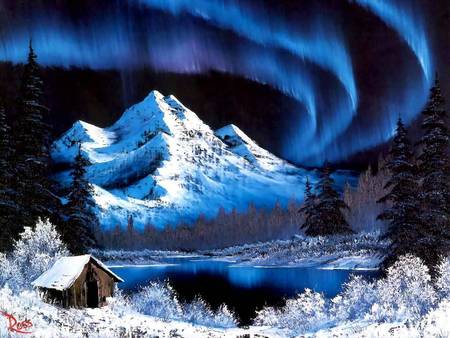
Bob Ross Painting Northern Lights
One of the most popular paintings taught, is the Bob Ross painting Northern lights. Northern Lights uses a black canvas, and 8 colours to produce a monochrome Arctic night scene. Add in the Northern Lights, and you have a painting that you will be proud to hang on your wall, see the video below to see how it is done, Contact me, Russell Collins if you would like me to take you on a journey from a black canvas to your own masterpiece. I am preparing my painting classes for 2018 and Northern Lights will be one of the first paintings.
Description of the Bob Ross Painting Northern Lights
The Northern Lights blazing across the sky, illuminates the snow on the craggy northern mountain. Furthermore, misty mountain foothills roll into the sharp tree line that ends at the snow covered lakeside, The Northern Lights reflections shimmer in the waters of the lake as the foreground foliage gives depth. The bushes around the lake are heavy with the frost of the sub-zero temperatures. And a trapper’s hut adds a human element to the scene.
Painting the Northern Lights With Bob Ross
Initially, Bob covers the canvas with Liquid Clear, and then a multi-coloured coat of paint. The base of the Northern Lights is then painted in with the fan brush. Then, upward sweeps of a 2 inch brush forms the shimmering and multi-coloured Northern Lights, Afterwards, the knife is used to form the mountain and snow, and the bottom of the mountain misted. Bob then uses the fan brush to paint in the foothills, distant trees and bushes. The foreground to the lake is added and the bushes highlight with white frost. Finally, Bob then uses the knife to add the Trapper’s cabin.
Bob Ross developed “The Bob Ross” style of painting, a technique that proves that anyone can paint, I am preparing my 2018 list of classes, so keep an eye on our “Painting Classes” page for further information.
